Wednesday, April 13, 2016

The Bicycle Test and Unrideable Bikes

Regular Retrogrouch readers know that my full-time job is teaching English and Speech Communications. In Communications, one of the things I occasionally bring up is how men and women communicate differently, and how their brains may even be wired a little differently. To illustrate that point, I reference a common psychological test that goes back at least to Jean Piaget in the 1930s  - something known as the Bicycle Drawing Test. Used as a gauge of cognitive development, mechanical reasoning, and visual-spacial functioning, the test asks subjects to draw a bicycle from memory. Men tend to do a little better at the task than women, and regular cyclists tend to do better than non-riders -- but regardless, for many people, it turns out to be a difficult task to draw a viable, workable bicycle from memory, and the resulting drawings can be amusing.

"Does the chain drive the front wheel, or the rear? Oh hell, why not BOTH!"
No pedals or chain. But those are some pretty jaunty-looking handlebars.
It turns out that most people know a bicycle when they see one, but don't apply much thought to its form or function. They know there are a couple of wheels. Most remember that there are some triangles involved. And a chain, somehow. But specifically how those various elements fit together to make a functioning bicycle eludes many.

I recently spotted this really interesting design project by Gianluca Gimini of Italy on Bēhance. Called Velocipedia, Gimini has collected hundreds of such bicycle memory drawings and then computer-rendered them to look like actual machines.

Here are a couple of samples:


This 2-wheel drive fatbike looks like it would be a total off-road beast -- IF you could ride it.


Un-rideable (or at least un-steerable) but I kind of like the integrated fenders on this front-wheel-drive model.


Another un-steerable design - but you've got to love the disc wheels and the little flag.
Gianluca Gimini gives a bit of background on his project:

"Back in 2009 I began pestering friends and random strangers. I would walk up to them with a pen and a sheet of paper asking that they draw me a men's bicycle, by heart. Soon I found out that when confronted with this odd request most people have a very hard time remembering exactly how a bike is made. Some did get close, some actually nailed it perfectly, but most ended up drawing something that was pretty far off from a regular men's bicycle."

During the course of this project, Gimini collected 376 drawings from people ranging in age from 3 years old to 88. Although he didn't realize (at least at the beginning) that the Bicycle Drawing Test was an actual psychological test, some of his findings seem to echo those done by more "academic" psychological studies. For instance, "Nearly 90% of the drawings in which the chain is attached to the front wheel, or both to the front and the rear, were made by females. On the other hand, while men generally tend to place the chain correctly, they are more keen to over-complicate the frame when they realize they are not drawing it correctly."

An interesting observation on the project is that the most "unintelligible" drawing, with the most unintelligible handwriting, came not from the 3-yr. old, but from a doctor. Must not have been one of those Serotta-riding doctors I hear so much about.

There is much more to see on Gimini's project page, so I encourage readers to click on over there to check out the collection.

Monday, April 11, 2016

Bike Shorts: How a Bicycle Is Made

The massive Raleigh complex in the 1950s.
(from Sheldon Brown's site - Retro Raleighs)
Throughout most of the 20th century, the Raleigh Bicycle Company was the true giant of the industry. As Raleigh grew, they did so at least in part by swallowing up or merging with much of the rest of the British bicycle industry. Throughout the decades, Raleigh had acquired hub gear maker Sturmey-Archer (and by extension, Brooks Saddles), Humber, Rudge-Whitworth, Triumph, BSA, and Carlton. Through mergers, they also came to control brands like Phillips, Hercules, Sun, Norman, and a few others -- many of which were built under the same roofs at the massive Raleigh factory. They even made bikes for USA-based Huffy. By their peak in the 1960s, the Raleigh factory complex in Nottingham covered about 40 acres and manufactured practically every part of their bicycles in-house. The closest thing to that kind of manufacturing might in the U.S. was the Schwinn factory in Chicago, and yet even though Schwinn did make their own tubing and frame fittings on-site, they brought in many of their bicycle components from other suppliers.

In the short educational film How A Bicycle Is Made from 1946, a father and son visit the giant Raleigh factory in Nottingham and get to see how a bicycle is made from start to finish. The mass-production on display is a real sight to behold, making this an interesting little film that proudly shows off Britain's industrial might from an era long gone, and in a way that may never be duplicated. Some of the manufacturing methods shown may be surprising, even to people already familiar with bicycle construction.


The film opens with a panning shot over the rooftops of the giant industrial complex in Nottingham. "Here is a factory in the heart of industrial Britain. A planned response to the world's demand for bicycles," says the narrator. 
Then the film takes us into the "chief designer's office" to "hear him tell two visitors just how a bicycle is made."
"I could go miles and miles on one of these, father," says the boy. "And so you should!" replies the proud designer. "There's a hundred years of bicycle manufacture behind that model." The designer then begins to explain the process of how the company mass-produces their bikes from the drawing board to the end of the final assembly line.
Here is a look at the tube-making part of the line. A huge spool of flat steel is fed into a machine where it's rolled into tubes, welded at the seam, and cut to length. The way I understand it, in the U.S., Schwinn made their own tubing in much the same way.

This sequence shows how a flat piece of steel is gradually shaped into a bottom bracket shell. The flat steel disc undergoes several pressings, eventually making a seamless shell ready to accept frame tubes and stays.
Two men put tubes and lugs into a jig and pin the joints to prepare the frame for brazing in a furnace. Notice the stacks of hundreds of frames behind the men.
They don't actually show the brazing operation - but a worker here pulls a hot, glowing frame from the furnace. I'm assuming that rings of brass were put into the joints, then the melted in the furnace, making it almost like an automated process.
After brazing, the frame is cleaned in a "special solution." They don't specify what the "special solution" is (probably some type of acid bath, I'd have to guess) but notice the huge cloud of vapors billowing out of the tank - and the worker with no kind of mask or even gloves. I wonder what that guy eventually died from?
After more cleaning, the frame is ready for paint. No spray booth here. Literally, the frame is dunked into a tank of enamel. It doesn't even look like the worker is wearing gloves as he dunks the frame - and he's even holding it right around the seat-tube. They don't mention how the frame doesn't have a huge hand-print in the paint job. Another scene shows female workers adding pinstriping to the painted frames.
Other scenes show the making of some of the components. In this case, the hot forging of Raleigh cranks - step by step from raw forgings, through final machining. Bottom bracket spindles, handlebars, fenders, and even some heat-treating processes are also shown.
After showing the process of building wheels - with its combination of manual labor and automation, we see the tubes and tires installed, almost entirely by "girls" (hey - that's the filmmaker's words, not mine).

"These girls are so expert that they can fit a tire and tube in under 50 seconds." 
When the frame and all the various components are complete, they are taken by conveyors from all their respective shops to the final assembly area.

Junior workers bring the partially assembled frame and the wheels to another part of the line where "skilled" workers fit the wheels and perform final assembly. Lastly, the finished and inspected bicycles go to a clearing department where we see what must be thousands of complete bikes -- "ready for dispatch to all parts of the world."
In the end, the Raleigh chief designer declares "Careful designing, reliable materials, and expert craftsmanship in every stage of manufacture turn out a British bicycle second to none."

"The bicycle is a comfortable and cheap way of getting about." says the narrator at the close of the film, with a series of shots showing people of all ages out on their bikes. "A great boon to man. Ideal for shopping, easy to park, handy for work. A faithful friend, ever ready to take tired workers back home. And after work, to bring relaxation, health and happiness."
With all those people on bikes at the end of the film, it's pretty clear that this film couldn't have been made in America, where in 1946, all anyone wanted after the war was to get a big, shiny, brand-new car.

There is a really nice copy of How a Bicycle is Made on YouTube, courtesy of the British Film Council.


Enjoy!

Friday, April 8, 2016

Troubles For The Neighborhood Bike Shop

Running a bike shop would have to be a difficult way to make a living. It's always been a "low margin" business, but in this era of widespread internet shopping it has to be tougher than ever for the little neighborhood bike shop to keep the doors open and the lights on.

Remember when the most worrisome competition a bike shop had to deal with came from Bike Nashbar, or the Performance catalog (or Bikecology, if you're a little older)? I'll bet there are a lot of older bike shop owners who think of those as the good-old-days compared to now.

Instead of a couple of mail order catalogs that offered somewhat lower prices in exchange for somewhat less convenience (like mailing in an order, and waiting a week or two for the package to arrive), there are now so many internet-based suppliers and so many choices, 24-7 ordering convenience with overnight shipping and no sales tax. And of course there are prices that undercut the lowest wholesale price the local shop can get on bikes and components.

I've always believed in supporting the local bike shop, but I was just reading an article that put their issues into a sharp focus. The article comes from Cycling Industry News. "Retail Comment: Why I've finished a long relationship with Shimano until dealers take a stand."

The commentary is from Drew Johnson, the owner of World Famous City Cycle. He starts his piece with this scenario:

"Today a friend brought in some new Shimano XTR brakes that he apparently bought online for $145 a unit . . . no sales tax, and free freight. My cost is $155 from the only US Shimano distributor."

Johnson went on to cite statistics that Shimano's sales are up 14% while sales through bicycle dealers are down 25% and dropping. What those numbers say is that internet sales are taking a bigger and bigger piece of the pie.

The commentary also touched on the problem of "showrooming" - a practice I wrote about a couple of years ago. Customers come into a shop to try on shoes then buy them online (shoes are probably one of the most commonly "showroomed" products in the bike biz). Sometimes they buy the shoes online before they've even left the bike shop by using their smartphones. Johnson estimated that 90% of the people trying on shoes in his shop end up buying them online. I have no way of knowing if that's an accurate statistic, but whatever the number, that's just flat-out a crummy thing to do. The way I figure it, if a person has no intention of buying the product from the local shop, then don't waste the time of the staff by getting their help and advice. The fact that there is a staff there to help and advise, and a physical space and inventory in which to do so, is a big reason that the price may be higher than the online shop.

It was pretty clear from the article that Johnson feels that Shimano is a major part of the problem, and says they seem unwilling to do anything about it. There are simply no controls on pricing of their products, so big online retailers are able to sell to the customer for a much lower price than what the local bike shop can get wholesale. Compare Shimano to a company like Apple which maintains a strong control on pricing. Whether someone buys their Mac, iPad, or iPhone from Apple, or BestBuy, Target, or an online retailer, the price will never vary by much -- and if one finds a price significantly lower price somewhere, it's almost certainly a sign of something fishy (such as a "counterfeit" item, or maybe a "reconditioned" item). The commentary mentions that SRAM is working on such controls, but so far Shimano is not.

For bargain-hunting consumers, in a time when bike and component prices just keep climbing, it may seem hard to see the problem (what are you saying - you WANT to pay more?), but the way I figure it, none of us is better off if a good local shop is forced out of business unfairly.

Johnson concludes his piece by saying he is going to stop carrying Shimano products (and Pearl Izumi, too, I presume, as they are fully owned by Shimano) and wants to encourage other dealers to do the same thing. Considering the huge role that Shimano plays in the bicycle market, that will be a tough thing to do -- I imagine most little bike shops would be unwilling or unable to follow that lead.

In fact, another article from Cycling Industry News also looked at the tough position bike shops are in. In "Are Retailers Afraid to Discuss the Growing Power of Big Brands?" the writer, Jay Townley, discusses the fears that many retailers have as the bike industry is controlled more and more by only a handful of really huge companies. Trek, Specialized, and Giant for bikes, Shimano, SRAM, and Campagnolo for components. If a dealer feels their agreement with one of these major companies is unfair, they are faced with a "rock and a hard place" kind of decision. When one company controls such a huge portion of the market, taking a tough stand (like dropping all Shimano products, for example) could potentially have a much more negative effect on the little shop than on the big company.

Another thing that could (or should) make bike shops nervous is the recent news that both Trek and Giant are going to start selling their bikes direct to the consumer through internet sales, using the local dealers as little more than a "point of pick-up." How long will it be before these major brands decide they don't need the local dealer at all?

Clearly, the bicycle business is changing. Fewer, but much larger, companies control much more of the market. Competition from online retailers is growing, and their business model and practices are so different from the brick-and-mortar shop that it has to feel like an unfairly stacked deck to the local bike dealer. Any bike shop that's going to survive is going to have to find a very different way of doing business in order to keep from being swept away by the changes. Bike shops have to find a way to keep themselves relevant and necessary to the bike riding public. Service and repairs are an obvious point for survival, but to thrive and not just survive, dealers will have to get creative.

What will the bike shop of the next decade be like? I just don't know - but this is probably a scary time to be a bike shop owner.

Wednesday, April 6, 2016

New Old Bike Project: Wheels

When I found my Specialized Expedition, it was still equipped with what I assume were its original wheels. The wheels were built with Specialized's own sealed bearing hubs and Mavic Module 4 rims, with 40 spokes rear, 36 front -- a heavy duty set of wheels to be sure.

I say I assume they were original, but I don't know for certain. I've seen different spec sheets for the bike, either from the company's catalogs, or from old Bicycling magazine buyers' guides, and the specs seem to vary. Some list Wolber Super Champion rims, others list Mavic Module 3, and it could have just depended on the year. Mine are Module 4. The one thing that's consistent is the Specialized hubs and the spoke count. So either the specs changed at some point (it wasn't unusual for things like that to change, sometimes in the middle of a model year and usually without notice) or somebody laced up a new set of wheels using the same hubs, or at least the same type. A lot can happen in 30 years.

An ad for the hubs, circa 1984.
In any case, I was already well familiar with Specialized's sealed bearing hubs from the '80s. They were really well designed, well-made, and easily serviced. I built some wheels with those hubs about 30 years ago, used them for a number of trouble-free years, and I still regret having eventually sold them. I've never tried to change the sealed cartridge bearings, but I'm told it's a pretty simple operation - if not for the home mechanic, at least for any decent bike shop. The hubs were made for Specialized by Sansin/Sunshine, who also made hubs for SunTour.

The Mavic Module 4 rims are somewhat like the venerable MA2, with a similar shape and cross section, but considerably wider. The MA2 rims were about 20mm wide, whereas the Module 3 was 22mm, and the Module 4 was a whopping 26mm wide rim! The rims also feature stainless steel double eyelets at all the spoke holes for more strength. The Mod. 4 were designed for heavy duty loaded touring and tandem use. They aren't light -- I've found weight listed at around 540 grams, which is at least 80 grams more than the MA2. Should be bomb-proof though, right?

When I took the wheels off the Expedition, I was pleased to see the sealed hubs, but on the whole I was underwhelmed by the condition of the wheels, at least visually. The hub locknuts and cones were brown with rust. The quick release skewers were mismatched -- the front lever was correct, but the rear one was a modern replacement (an open cam design! Oh, come on!). The wheels overall were pretty grimy, the rims looked dull, and the rim eyelets were all rusty. Rusty?! They're supposed to be stainless steel! So, guess what? Stainless steel can actually rust. Who knew? There are different grades of stainless steel, which contain different percentages of chromium (anywhere from 12 - 30% thank you, internet) which is primarily what makes it "stainless." But it can, and does, rust.

I had another set of wheels waiting in the wings that I was perfectly content to use on this bike, but I took the time to examine these Specialized/Mod. 4 wheels a little more closely. Turning the axles in the hubs, I found that the bearings were still butter smooth. And even if they weren't, as I mentioned already, they'd be easily serviced. Just for grins, I put the wheels into my truing stand. The front one was absolutely perfectly true. The rear wheel had just the slightest bit of lateral runout. The spokes and nipples, once wiped with a bit of oil, turned smoothly and I got the rear wheel running true in a matter of minutes. I don't know how many miles these wheels had seen, but I guess I shouldn't be surprised at their trueness, considering the heft of the rims and the fact that they were 36/40 spokes.

OK, any other problems? Well, turning the rear axle and watching it closely, I suspected that it might have been ever-so-slightly bent on the drive side. I couldn't even be certain until I pulled the axle out and held it up next to a good straight-edge. Turning it slowly against the straight-edge, I could see just a tiny gap appear at one end. Maybe 1/32 of an inch at the most. Probably acceptable for use as-is, but I swapped it for a new one. I didn't want a slightly bent axle to lead to any premature wear. I know -- premature wear -- sounds funny when you're talking about a set of wheels that are already 30+ years old.

I still had the cosmetic issues to deal with, so I ended up spending a rainy Saturday with some steel wool, metal polish, and rags, and worked at them until my fingers were raw. It was painful, but satisfying work, and they cleaned up surprisingly well.

Then there was that abhorrent mismatched quick release skewer. It happens that I have a bag of old quick release levers and skewers. Various brands and types. Some complete, some in pieces. When it comes to things like that, I just don't like to throw anything away. So I look through the bag and find an old Specialized front skewer of the right style with just a bit of rust peppering the chromed surface. Totally workable. I also had a couple of '70s and '80s vintage rear wheel skewers from different brands. Nice thing about these older-style Campagnolo-copy skewers is that they're easily disassembled, and a lot of them (but not all) are similar enough to one another that the parts are interchangeable. A little trial and error, some mix-and-match, and I was able to put together an appropriate matching replacement.

In the end, the wheels looked more than acceptable.

My rear hub, and my mix-and-match "proper" quick release lever. Even the hub locknuts/cones cleaned up with some steel wool and a good oil rub.
Super-duty Mavic Module 4 rims. No more rusty eyelets.
Front hub, and a nicely cleaned quick release lever. And the levers front and rear now match. 
I mounted a like-new Shimano 600 6-speed freewheel - 13 - 30 teeth. 
One other thing about these old wheels is that they are current-standard 700c, which means plenty of choices in tire sizes and styles. The Expedition of the early '80s bucked the convention of the time in that it was equipped from the start with 700c wheels. That says to me that Tim Neenan and Specialized were pretty forward-thinking about the bike's design because most road bikes in the American market in those days were still equipped with 27" (ISO 630). Better racing bikes were starting to be seen more often with 700c wheels, but the old American standard stuck around for a number of years in the '80s, especially on touring bikes and more "recreational" road bikes -- the rationale being that 27" tires would be easier to find in any bike shop or hardware store in even the most backwater little towns. Or at least that's the rationale I remember hearing back then.

Not having to do a wheel size conversion was important to me as it eliminated a lot of potential pitfalls that can happen. If a bike has sidepull or centerpull caliper brakes, converting from 27" to 700c is pretty easy. Often it's just a matter of sliding the brake pads about 4 mm lower in the brake arms. If the original brakes don't have enough "reach" to make the change, it's easy enough to get longer-reach brakes, old or new, to fit almost any budget. With cantilever brakes, where the pivot posts are brazed directly to the frame/fork, there can be any number of problems that crop up, adding to frustration.

Pitfalls? So much of it becomes dependent on the right choice of brake model and design -- how much vertical adjustment is there for the pads? More importantly, because the brakes move toward the rim in a fairly tight radius arc of movement -- inward and downward -- the amount of pad angle adjustment becomes crucial. In some cases, one can find a brake with long vertical slots that allow a lot of up/down adjustment, but it could be impossible to get the brake pads to contact the rim at a useable angle. Some older road bikes with cantilevers have the mounting posts spaced much closer together than mountain bikes or even more modern bikes, which can further complicate things. Even rim width can affect the success of the conversion. And in all of this, it can be impossible to know if a set of brakes will be workable until you actually try them. Unless one has a huge stockpile of different cantilever brakes to experiment with, that kind of trial-and-error can get expensive.

So, yes - I was glad to have 700c wheels. These super-duty wheels could prove to be overkill for my needs, but they're a cool piece of the project.

More to come . . .

Monday, April 4, 2016

You Knew It Was Gonna Happen: 12 Speed Cassettes

It was inevitable, wasn't it?

Understand that I almost posted this on Friday, April 1st, but I figured that anyone reading it would think it was a joke.

Maybe to prove that nothing succeeds like excess, SRAM has announced that they have made front derailleurs obsolete by introducing a 12-speed cassette - with a massive 50 tooth large cog.

Dubbed the XX1 Eagle, the 12-cog cassette goes from 10 to 50 teeth for a freakin' 500% gear range
with a single chainring. (photo from SRAM)
Think about that for a moment. If you're my age or older, you might remember your first 12-speed bike. Not 12 cogs on the rear wheel -- that was 2 x 6 = 12. How quaint that was.

To build anticipation for the announcement, SRAM even posted a "eulogy" video for front derailleurs (at least for mountain bikes):


No plans so far to make a road version (or so they say), but who's to say somebody won't? And having so much range with a cassette is supposed to eliminate the need for multiple chainrings and a front derailleur, but if 12 is good, wouldn't 24 (or 36?) be even better?? How are bike and component makers supposed to convince current riders to "trade up" without new innovations like more speeds?

I'm sure that in the same way Campy's 11-speed cassettes practically forced Shimano and SRAM to offer their own 11-speed systems, and those 11-speed road systems were quickly adapted for mountain bikes, I figure it's only a matter of time before we're seeing road groups with 12 speed cassettes and double chainring cranks. Get ready for it.

It's inevitable.

Friday, April 1, 2016

The New Old Bike Project: Headsets

I've written quite a bit in the past about some of the components from Specialized in the '80s. Most of the parts were really well made and offered a good value at the time. One of those parts was the sealed headset, which I believe was made to Specialized's design by Tange Sekei. With rubber o-rings and a special channel-seal design, it was a unique piece. They were available in both steel and aluminum versions.

An ad from 1985 features a cutaway view revealing the o-ring channels.
The Specialized Expedition I've begun renovating came equipped with a couple of Specialized's own branded parts, including the steel channel-sealed headset. Despite 30+ years of use, I pulled this off the frame and found it to be in remarkably good condition. Once it was cleaned up, I could see that the bearings and races were still in great shape - ready for many more years of use. The chromed steel finish on the outside had developed a faint rusty tarnish, but that cleaned off easily with nothing more than a bit of metal polish.

Specialized channel-seal headsets from the early 1980s. The steel version is on the left, and the aluminum version is on the right. Both have steel bearing races and rubber o-rings that snap into a channel in the cups. The aluminum version has thicker cups and a slightly taller stack height than the steel -- a couple millimeters or so.
Not only do I have the steel version, but as the pictures show I have an aluminum one as well. The aluminum one came off another old bike I had done some work on a few years ago. It was covered in so much grime that I'm not sure I even realized at first what it was. After I cleaned it up, I discovered that it was in good condition and I was super pleased to discover what a nice piece I had. It had some visible wear in the races, but nothing excessive. I set it aside for another day.
Apart from the bearings, it doesn't appear to me that the internal pieces would be exactly interchangeable between the steel and aluminum versions. On the aluminum headset, the fork crown race, as well as the top head-tube race are slightly thicker to account for the taller, thicker aluminum cups. In this photo, you can just about see the tiny channel around the inside rim of the aluminum cups -- the o-rings snap into those.
With the Expedition project, I thought about using the aluminum model headset, but ultimately I decided against it. The stack height is just a bit taller -- it would probably work but it would be close, and I wouldn't be comfortable having the aluminum top locknut only engaging a thread or two. As was done so often back in the day, the Expedition was built up with its stock headset, including a single keyed washer, and no extra spacers -- then the steerer tube was cut to fit exactly. I find that a lot when fixing up old bikes. It's as if nobody could ever imagine needing (or wanting) to change a headset someday, or using a headset that might possibly have a taller stack height. No big deal -- the steel one will work great, and I know it fits perfectly. The aluminum one will just wait for the right bike to come along.

These headsets come up on eBay from time to time, and they sell for more money than one might expect. At a time when one can still find brand new 1" threaded headsets for about $20 -- units that look similar to these vintage ones but without the seals -- it's not unusual to see these Specialized sealed headsets selling for $50 or more for used examples. A lot of money for a used headset, to be sure, but it's a testament to their quality and longevity.

Wednesday, March 30, 2016

What's Better Than A New Old Bike Project?

Is there anything better than getting a brand new frame to build up -- or maybe (as in this case) a great old frame, just back from the paint shop?

My new old bike. Just returned to me from Franklin Frame in Newark, Ohio. A new or freshly painted bike frame even has a great smell to it.

The anticipation is tremendous -- opening up the box, and pulling the meticulously wrapped frame and fork out. Then bit by bit, carefully peeling back the wrapping, to reveal the glossy, freshly painted frame inside.

Metallic Burgundy -- a favorite of mine. Next I need to put on the restoration decals, recently received from VeloCals.
So, you may be wondering, what is it?


It's a 1984 Specialized Expedition. One of the nicest loaded touring bikes of its time.

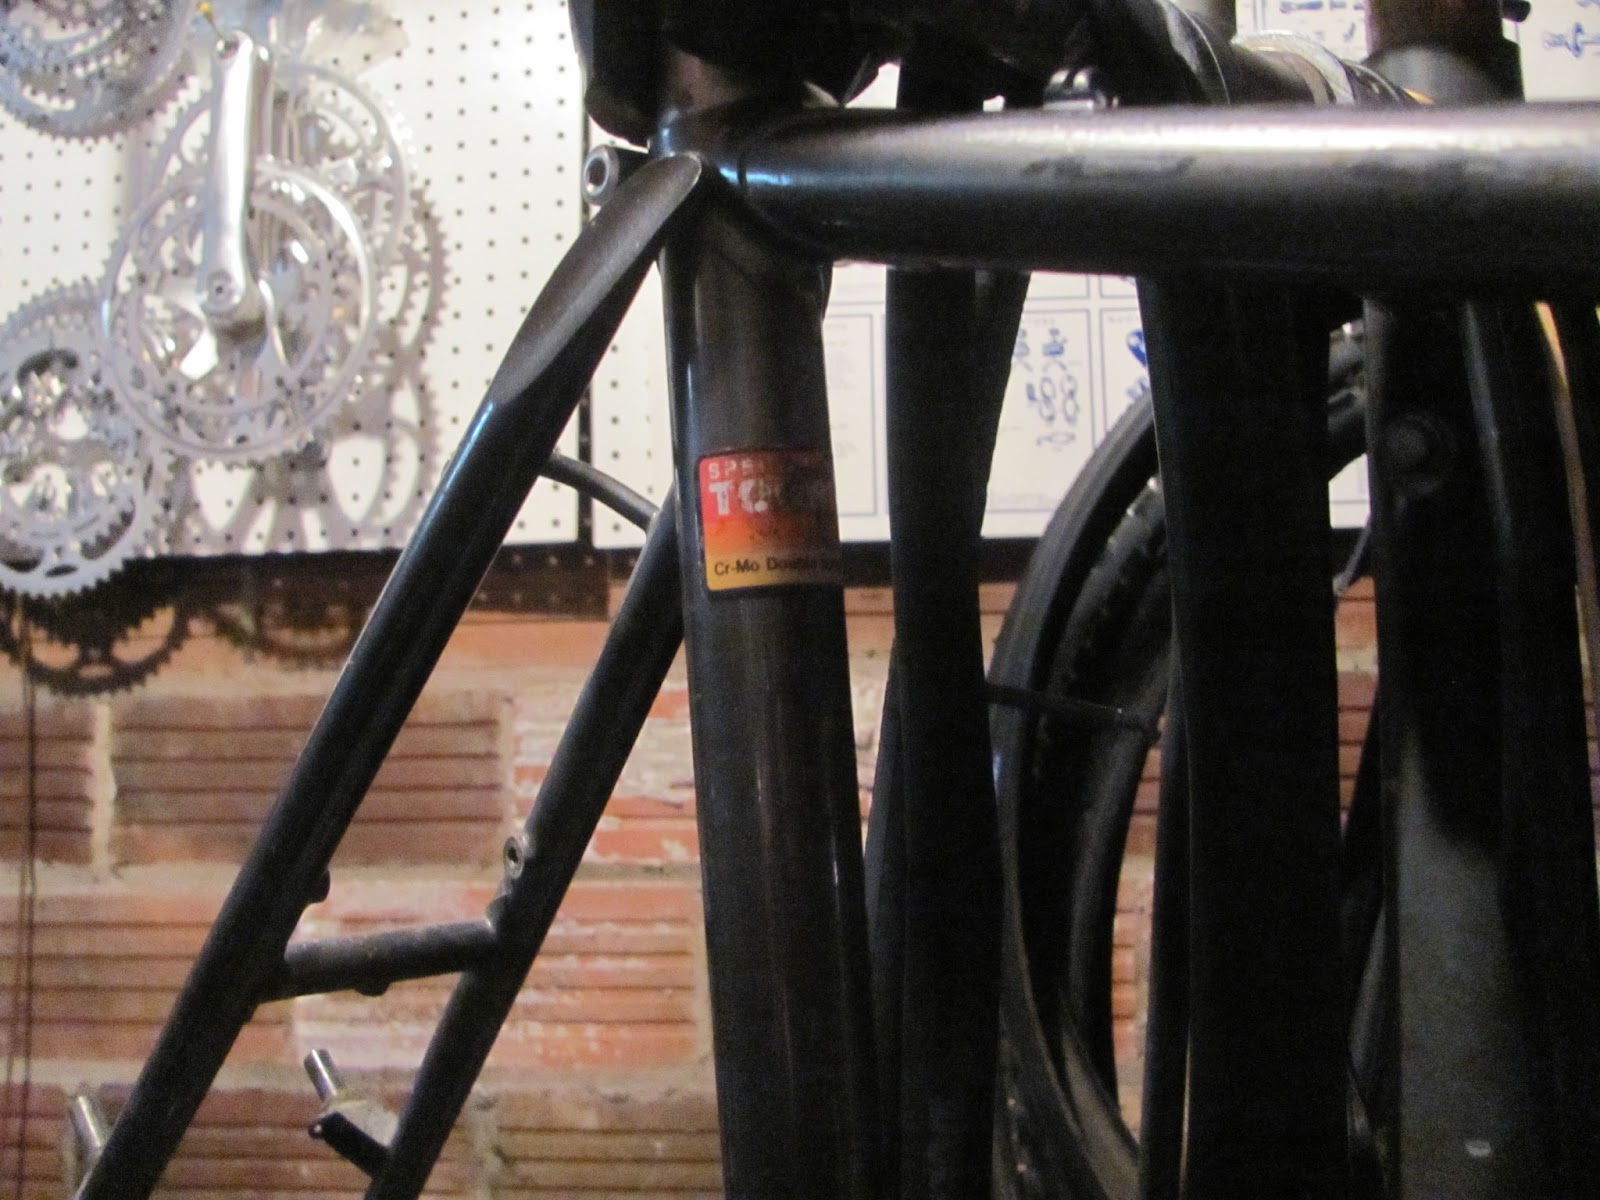
Specialized bikes of the early '80s had minimal graphics. "Expedition" on the down tube, a stylized "S" on the head tube, and a couple of tubing stickers. Nothing more.
The way I understand it, the Specialized Touring tubing was a custom tube set made by Tange in Japan to Specialized's specifications. The tube dimensions or wall thickness for the main triangle are reported to be similar to Columbus SP -- 1mm/0.7mm/1mm.
These early '80s Expeditions were designed by Tim Neenan, who was Specialized's frame designer at the time. He also designed the sport-touring Sequoia model (another great bike!) and the first Stumpjumper. Neenan is now the man behind Lighthouse Cycles, which today makes updated custom-built versions of both the Expedition and Sequoia.

As far as I know, the Expedition was only available in a charcoal gray metallic, which was a really common bike color in the early '80s. People often picture garish neon colors or "Miami Vice" color schemes (like coral pink and turquoise) when they think of the '80s, but the early part of the decade was actually much more subdued than that. My example had some pretty dull and tired paint, worn through in some places, and some surface rust poking through in others. Since I actually plan to get a lot of use out of it, and it is not a particularly rare or collectible bike, I decided a repaint was in order. And in that case I took the liberty to choose a different color. The metallic burgundy is, I believe, a timeless color for any bike -- and with the reproduction decals in place, it's hard to believe that the bike wasn't available in this color originally.

Through posts on one of the bike forums by both Tim Neenan and Specialized's Bryant Bainbridge, I'm surmising that the bike's frame may have been built in Japan by Miyata. That company made frames for Specialized for a year or two, but according to Bainbridge, Miyata wanted more control over the production specifications than the folks at Specialized were willing to relinquish. Frame production was later spread out to other, smaller Japanese builders (I believe Toyo was one of them, which today makes some frames for Rivendell). After the dollar crashed against the Yen in '86 they had to start sourcing bikes from Taiwan. Those were nice bikes, but the workmanship on the Japanese-built frames was second-to-none.

Some Before Pictures:

Oddly enough, bikes never look very good in the snow.


Not a great picture, but you can get a sense of just how tired the paint was looking.
The bike, as I found it, had obviously seen a fair amount of use, but even after 30+ years still had many of its original components. Based on spec sheets from the time, the original components would have included:

Crank: Sugino AT triple
Wheels: Specialized sealed bearing hubs, Mavic rims - 36 front/40 rear
Brakes: Shimano Deore MC-70
Headset: Specialized sealed bearing, steel
Handlebars: Specialized, made by Nitto

Some parts that had certainly been changed over the years include the derailleurs, shift levers, saddle, and stem. I believe the seat post may also have been changed. It was the same model as originally specified (SR Laprade -- ubiquitous in the '80s), but the tubing dimensions and everything I can find about the Expedition tells me it should take a 26.8 mm post, and the post that the bike came with measures in at 26.4. My suspicion was raised when I loosened the seat lug binder and the seat post slipped right down to the head all on its own. That, and the binder ears appeared to be more "pinched" than what seemed to be prudent.

Another thing that was changed - questionably - was that someone installed a mountain-bike style quick-release seat post binder bolt. I say "questionably" because such a bolt is totally inappropriate on this type of bike, and it was a terribly bad fit for the type of seat lug binder ears. Between the ill-fitting bolt and the slightly-too-small post, it's lucky the seat lug wasn't irreparably damaged.

Regular readers know that I've had a number of posts in the last few months about various components that I've been gathering. If you haven't guessed, many of those will be going onto this bike in the next few days. Those include:

Specialized "flag" crank


Specialized touring pedals

Shimano MT-60 derailleur

Shimano MT-62 brakes

Brooks B-17 saddle


Upcoming posts will take a closer look at more of the components I'll be putting onto the bike, and eventually, pictures of the completed package.

Stay tuned!