Wednesday, March 11, 2020

Match Your Shoes to Your Suit

Whenever I select a frame and components to build up a bike, I'm one of those people who really likes to pay attention to details. Whether picking out colors for paint, choosing the "right" saddle, choosing bar wrap, matching up the right components for the bike and its particular "mission," and even down to selecting cable housing or toe straps -- I enjoy putting together a bike that not only works the way I want, but also satisfies my aesthetic taste.

When it came to picking out the saddle for the Sequoia, I had an extended moment of indecision. I knew I was going to use a Brooks leather saddle - that part was easy. But which color would look the best with the bike? The frame color is kind of a medium/dark blue, and Brooks saddles come in black, brown, and honey/tan (and occasionally some limited runs of other colors like blue or green). Which to choose?

I did a quick search online for pictures of bikes like mine and found that the vast majority were paired with black saddles. That seemed like the "safest" choice, but I wasn't sure it was the best one for me.

Blue suit, brown shoes.
Ultimately I took my inspiration from what some people might think is an unexpected source: the sartorialists at the men's fashion magazine, Gentleman's Quarterly. Yep. GQ.

You see, when I'm at work, I wear suits. Every day. Well - sometimes on Fridays I'll wear casual pants with a sport coat. I mean, I'm only a teacher, but I believe in dressing professionally. It's something that started when I was the leader of the teachers' union and I frequently had to meet with administrators or school board members (most of whom are local businessmen) and found that they took me and my demands a lot more seriously when I was dressed like them, if not better.

See the similarities?
So, I've found that a lot of men wear black shoes with everything. It's the "safest" choice. The default, if you will. But it's not always the best, stylistically. A lot of guys will wear black shoes with a blue suit, for instance. That's okay - but the better choice is actually brown.

With a navy blue suit, you'd want to go with a darker brown shoe. A lighter blue, and you could either go with a medium brown, or maybe more of a tan shoe. And then you match the belt to the shoes. If you still wear a watch (many people don't anymore) and if the watch has a leather band, ideally you'd want the band to match the belt and shoes, too.

Well, I figure the same advice can be applied to a bike. For example, I think my light blue Rivendell looks awfully nice with a honey tan leather saddle. And then, like matching the belt to the shoes, I often like to match my bar wrap (and toe straps, too!) to the saddle.

It seemed to me that in this case I could either go with the "antique brown" or the "honey tan" leather for the Sequoia's medium blue paint. In the end, that suit and shoe combination pictured above struck me as being "right" and helped make my decision. The antique brown leather saddle, combined with brown shellacked bar tape would be my combination.
By the way, I found this handy guide for matching suits and shoes online. You're welcome.
Sometimes inspiration comes from odd places. Then again, I'm reminded that noted fashion designer Paul Smith has done several collaborations with Mercian cycles in England and often gets inspiration from bicycles. So maybe not so odd.

Sunday, March 8, 2020

Sunday Shake Out Ride

The vintage Sequoia is nearly complete. We had gorgeous weather today - our first truly spring-like day this year - and with that in mind, I made it a priority this weekend to get the bike road worthy.

I got all my cables hooked up, brakes and derailleurs adjusted, pumped up the tires, and after a few spins around the block to make sure things were working more or less as they should, I took it out for a real "shake out" ride into the valley.

I still need to wrap the bars. I didn't want to do that until
after making sure the stem length felt right and levers
were placed where I wanted them.
Some first impressions: I don't know if it's the well-designed frame, or the 32-mm Gravel King tires (probably both), but the ride is is really nice - definitely what I'd been hoping for. We currently have a lot of broken pavement, and the bike seemed to soak it up very well. The bike also handles predictably - not super quick (remember it's not a racing bike), but well-composed. I had an experience on my descent into the valley where the handling was very reassuring. The descent is fast and twisty, and I discovered a huge patch of badly broken pavement right at the apex of a tight, blind curve. Just coming around the curve and "surprise" - but the bike stayed planted and I barely broke my line through the turn. Like I said: reassuring.

On my ride, I had only two things that I needed to address: I pushed my saddle back about a centimeter (the seat tube angle on the Sequoia is a bit steeper than one would expect for a bike like this), and I had a bar-con shifter that needed to be tightened slightly to keep it from slipping. You have to get just the right balance for those. Other than that, everything felt right and worked just like it should.


Down in the Cuyahoga Valley National Park, this is the perfect time to see the great blue herons. There is a heron "rookery" in the park, and now - before the leaves come back - you can easily observe the huge, almost prehistoric-looking birds nesting. There are dozens of nesting pairs easily visible in the trees.

Unfortunately I only had my cell phone for pictures and couldn't zoom in enough to get a really good image of the birds. Trust me - those dark masses in the branches are nests - and there are herons in them. 

Back home again. A few posts back, I'd mentioned I wasn't certain how well the Cyclone front derailleur would handle that wide spread of gearing (50/36 chainrings) - but honestly, it shifted like a champ. Shifts both up and down were crisp and immediate. Could not be better. Let me just point out that I've installed vintage Specialized-branded toe clips and leather toe straps from Soma Fabrications.

I just want to come back to that ratcheting bar-end shifter for a moment. On one side, there is this slotted round, domed "nut" that fits almost flush with the body. These things sometimes get lost, and the shifters don't stay adjusted without them - but it's also a little difficult to get them properly tight. The end of the screw comes up through the middle, and fills up some of the slot so a screwdriver doesn't quite get enough bite.
My solution: I took an old flat-blade screwdriver, and with a small square file, I filed a notch in the end of the screwdriver to clear the end of the screw. That allows me to tighten the domed nut much more easily. Also, a drop of blue Loctite is a good idea in the final assembly. I've never lost one of domed nuts.
I was pleased with the fit and feel of the bike, and so now my next job will be to wrap the bars and get some shellac on them. When finished, they should be a good match for the saddle.

Well - that's all for now.

Friday, March 6, 2020

Fixing a Crimped Seat Tube

In a recent post, I mentioned that when clamping a bike into certain types of work stands, it is not a good idea to clamp the jaws onto a frame tube as the thin-walled tubes can be easily damaged. For that reason, I always clamp around the seatpost, which tends to be thicker and less likely to suffer.

The red Mercian is one of my "go-to" bikes.
As mentioned in that post, I've seen multiple frames that had been damaged from a work stand clamp, including one of my prized Mercian bikes. The damage to the Mercian was not readily noticeable and I didn't even see it when I first took delivery of the vintage frameset, but the seat tube just a few inches below the seat lug was crimped slightly -- the size, shape, and location of the crimping was totally consistent with the jaws of some work stands. I could see it if the light shone on it just right, but the real issue presented itself in trying to install the seatpost. It seemed that the right size seat post should have been 27.2 mm, as that was what would fit into the seat lug properly. The problem was that I couldn't insert the post more than a couple of inches. A few inches in, it would get impossibly tight. For a while, my solution was to use a smaller diameter post (I think I needed to go down to 26.8) and put a shim at the top where the seat lug/binder would clamp around it. I say, that worked, but I didn't like it as a permanent solution.

I thought about sending the frame off for a professional repair. Had the damage been worse, or been on any other frame tube, I probably would have sent it out. Being that it was pretty shallow and on the upper part of the seat-tube, which is open at the top, I thought I could probably try fixing it myself first. I hope nobody with frame building and repairing experience cringes when they read that, but I had a pretty good idea of the mechanics and the process of it and decided it was worth a try.

First, it's good to have an understanding of what a dent or crimp like this actually does to a tube.
The red line in this diagram should give an idea of what kind of distortion happens when a tube gets dented. It's not just that there is a "low" spot, but there is also typically a corresponding "high" spot on either side of it. The crimp I was dealing with was very similar in depth to this one - pretty mild - and was about 4 inches long - like the jaws on some work stands. So it seemed that for the best result, I'd want to address the "low" spot from inside the tube, while working at the "high" spots from the outside.

Having corresponded with framebuilders and others with frame repair experience over the years, I've learned about a couple of different tools that they use to remove dents. To work from the inside of a tube (if one has access to the inside, as in a seat-tube or head-tube) to remove the "low" spot, they might use some kind of tubing expander tool. And to work the "high" spots on the outside of a tube, they'll use frame blocks like these:

Blocks like this are made to exactly match the proper outside diameter and roundness of a frame tube.  Even if one can't work the inside of a frame tube (like the top tube or down tube), blocks like these can often remove or at least greatly lessen the severity of a dent.
If one isn't in the business of doing these kinds of frame repairs, then the cost of tools like this can be pretty expensive. My home-garage solution consisted of a cheap "sacrificial" seatpost, and homemade wooden frame blocks.
Although it doesn't have any kind of expanding feature, with the shallowness of the dent I had, it seemed to me I could get decent results from an extra-long seatpost in the desired size. The main requirement for my plan was that it have a forged one-piece design as opposed to the kind where the head is bonded to the post. I knew I might have to apply some significant force on it during insertion and removal, and I didn't want the head to snap off. Such posts can be found for about $10.

For the frame blocks, I took a block of wood and bored a nice straight 1-1/8-inch hole through it with a forstner bit, like this one:
Next, I split the block in half with the grain. I didn't want to saw it in half, as that would remove some material and my resulting bore would be somewhat less than 1-1/8 inch, and no longer perfectly round. Another way to do it is to cut the block in half first, clamp it tightly together, and then bore the hole between the blocks.

To perform my operation (and again - try not to cringe), I started by inserting the extra long 27.2 mm post into the seat tube. When the post started to encounter resistance, I kept twisting and lightly tapping it in. I made progress very slowly, tapping and twisting until I knew the bottom of the post was well past the crimped part of the seat tube. Would I be able to get it back out? Well, it seemed to me that as long as I could twist it (even if it took some effort) I'd be able to get it out. But I also calculated that if I successfully removed the crimping, it would come out easier than it went in.

To work the outside of the crimp, I heavily greased my wooden blocks and placed them around the dent and put them into my vice. It is important not to tighten the blocks all the way, but to get them to where there is just a slight bit of resistance, and then twist the frame back and forth between the blocks. You have to work slowly, twisting the frame, slightly tightening the blocks - continually twisting, tightening, etc.. It takes some patience as you don't want to force anything or do too much too quickly. I didn't have much trouble because my dent was not particularly deep or sharp - and it was definitely lessened by tapping the seatpost down through the dent.

After I got the blocks tightened all the way and could twist the frame freely between them, I could tell it was done as well as I was going to get it. I took the blocks off and removed the seatpost. I knew immediately that the crimping was better because getting the seatpost out was much easier than getting it in. That shouldn't be a surprise - the seat tube was now much rounder than when I started.

It's also important to note that the frame block operation can often destroy the paint. I was lucky. Whether it was because I was using wooden blocks, or lots of grease, or because the damage was so minor to begin with, but my paint only got a bit "scuffed" but wasn't badly damaged. I was able to buff it back to where you could hardly tell. Even in good light, it's really hard to see there was any damage at all. Best of all, I can get the proper seatpost inserted without trouble.

I want to point out again that I normally leave frame repairs up to the experts, and I don't necessarily recommend other people try to do what I did here. Unless someone feels really confident in their home-wrenching skills, I might say this is one of those "Don't try this at home" situations. As I'd said earlier, if the damage had been worse than it was, I might not have even tried it myself, and even as I was doing it, I proceeded slowly and with a lot of caution. But in the end, I was happy with the result, and satisfied knowing I did it myself.

Monday, March 2, 2020

Putting It All Together

I've been making some progress putting my vintage Sequoia together, though I've been taking it slow. There's not a rush (weather hasn't exactly been beckoning me to get out to ride it), and I see nothing wrong with doing a little at a time - plus, I get to enjoy the project longer.

It occurs to me that I have built up dozens of bikes from framesets over the years - maybe many dozens. I suppose everybody does things a little differently when they build up a bike, but when I take a bare frame and start building it up, I follow a pretty consistent process. Here's what I've done so far with the Sequoia:

In the previous post, I showed that my first step after getting the frame back from the painters was putting on decals. Next comes installing components. For me, the first thing I do is install a seat post - in this case, a new-old-stock SR Laprade - and the reason it's the first thing is because when I put a bike into a workstand, I always want to clamp the bike by the seat post rather than one of the frame tubes. I've seen more than a few frames that were damaged by clamping the workstand jaws around a frame tube. With the frame held firmly in the workstand (by the seatpost!), I can start installing the rest of the components.

My next step is usually the headset and fork. To press in the headset cups, I use a homemade headset press -- just a threaded rod, some washers and a couple of nuts, and some wooden blocks to help keep the press aligned and to help prevent damage to the cups/races. Some modern sealed bearing headsets (like Chris King) require a dedicated press and special adapters to prevent damage (and I assume to preserve the warranty), but my homemade press seems to work just fine on traditional old style headsets like the one I'm using.

After the fork, I usually install the bottom bracket and then the crankset. For my bottom bracket, I have a Phil Wood. Yes, they're expensive, but they are trouble-free and seem to last forever (I've got one on my Rivendell that's going strong after nearly 20 years!). Mine was sold as "used" but it looked and felt like brand new, and cost barely more than half what they usually cost. One additional feature of the Phil BB  besides its extremely long service life is that it has a little bit of adjustment laterally, so a person can fine-tune their chainline.

I had a slight change in my components since I last wrote about my selections. I had mentioned that I was hoping to find a Specialized crankset (preferably the early '80s "flag" logo version) for the Sequoia. Since writing that, I did find my "close second" - a Specialized ST-4 triple. The design of the ST-4 looks almost identical to the original "flag" crank, but was made a few years later and can be identified by the slash "S" logo. The one I've got appears to have had almost no use at all. I did take off the inner chainring to make it a "compact" double with 50/36 rings.


Next comes the derailleurs. The rear one is a simple bolt-on operation. The front needs to be properly aligned with the chainrings. I like to get the height set up so that the cage is about ⅛-inch above the large chainring -- super close but without any danger of the cage hitting the ring. I sometimes see bikes with a huge gap (like 1/2 inch or more) between the front derailleur cage and the chainrings and all I can think is how the heck does that thing even manage to make the shift? For the angle, I usually start with the cage parallel to the chainrings, though I sometimes tweak that by a degree or two after I get the chain installed and see how the shifting is.

The Cyclone M-II has a "B" adjustment screw to set the angle. Later, after the wheels and a chain are installed, I'll need to set that for the best shifting with my chosen freewheel. While I was at it, I also installed my dropout adjuster screws.

After the derailleurs, I'll put in my wheels, followed by brakes.

I was pleased to see how much clearance there is in the frame with these 32-mm Gravel King tires. I think I could install fenders if I wanted to, though that has not been part of my plan. Or without fenders, I could probably fit even larger tires some time later - I think it could fit 35-mm tires.
The brake pads are all the way at the bottom of their slots to reach the rims. Wow. I did not expect that. But like I said - lots of clearance!
The pads aren't quite at the bottom of the slots on the front brake, but still, plenty of room.
Bars and stem are next, followed by brake levers. I decided to use the Dia Compe aero levers with this build.
Then comes the shifters - whether on the down-tube, or bar-ends as is the case here.
Pedals are next - SunTour Superbe pedals with brand new cages.
And then the saddle. I had major indecision on saddle color, but I think this will be good. More on that later.

Well - that's all the major stuff. The next steps will be installing the cables for brakes and shifters, along with chain, toe-clips and straps. Then all the adjustments and fine-tuning. Lastly, wrapping the bars. That will all be covered soon. Stay tuned. . .
Monday, February 24, 2020

Antici-pay-yay-tion

With a couple of months of anticipation building, things are starting to come together now that my vintage Specialized Sequoia frame is back from the painters.

Fresh from the painters. Still needs decals.
There's something really incredible about a fresh, newly painted bike frame and a full collection of nice components to complete it. I mean, a newly painted frame even smells good. Add to that the smell of Brooks Proofide on a new leather saddle, fresh grease, and new tires, and a new bike project is a feast for the senses.
Decals are placed - and it looks awfully nice.
For paint, I took the frame to Franklin Frames in Newark, Ohio. The builder/painter at Franklin is Jack, and he does excellent work, and his prices are among the most reasonable in the business. The turnaround time wasn't too bad, either - it was about 6 weeks from drop off to pick up. And as an added bonus, he's located only about 2 hours away from Akron. I've had Jack do frame repairs on a couple of different frames for me in the past, and he did the beautiful burgundy paint on my Expedition a couple years ago.


In the past, I've always boxed the frames up and shipped them, but this time I decided to skip the packing and shipping and just make the drive to Newark so I could meet up with Jack in person. That was helpful because I really liked the original color of the Sequoia and wanted get his advice and look at color samples to help us get as close as possible to the original shade. I think we got pretty close to the shade, though the new paint has a more pronounced metallic sparkle than the original, which had just a very fine, subtle metallic to it.

The workmanship on these is really special for a production frame. The long-point lugs are nicely thinned, and the shorelines are very clean. The tubing stickers don't identify the maker, but the Special Touring tubes were a custom-order tube set from Tange.

Apart from chipped and scratched paint, the frame was in pretty nice shape as I got it. One thing I wanted to get addressed, though, was the top tube cable guides. There was some rust under them, and even though it wasn't bad enough to make it a repair issue, I asked Jack to remove them. Fact is, those little guides, which were so popular on bikes in the '80s, are total sweat traps. I almost never find old bikes from that era where they don't have rust bubbling up around them. Same goes for the little cable clamps that were once common, if not installed with care. As an alternative, I had him braze on split cable stops to the lower side of the top tube - which I think is an improvement for durability, and also makes cable replacement easier. Some people also feel that brake feel/action is improved slightly by reducing some of the length of housing that the brake cable has to pass through (nevertheless, I don't know that I've ever noticed the difference).

Showing a little SunTour pride. That was not part of the standard Sequoia decal set, but one I added. When I got the frame, it had a sticker in that location for a different component brand - I figured I'd give a little credit to SunTour for the fine components I'll soon be hanging on the frame.

Decals came from VeloCals in California (the SunTour one came from Cyclomondo, aka Greg Softley). The originals on the frame were of the "peel-n-stick" vinyl variety, which is the same thing one gets from VeloCals. Rather than have the decals put on at the painters, I opted to install them myself after getting the frame home. There's no real trick to it apart from making sure the surface is super clean, and not handling the decals too much and getting fingerprints in the adhesive. Well, you have to be careful to get them on straight, too.


One thing I find interesting about the graphics that Specialized was using in this generation of bike frames is that they are exactly the opposite of what one finds in bike graphics today - or maybe any day. First of all, the main logo on the downtube is the model name "Sequoia," while the brand "Specialized" is in tiny font and barely noticeable. Typically (especially today), the brand name is like a billboard on the downtube, visible from half a mile away, in addition to more branding and logos on top tubes, seat tubes, and sometimes even the forks and stays. On these early '80s Specialized bikes, the graphics overall are minimally tasteful. Just a name on each side of the downtube, and a small "S" logo on the headtube.

That's what I can show for right now. There will be more, so stay tuned.

Tuesday, February 18, 2020

Gathering Parts - Bars & Stem

As I'm gathering parts for the Sequoia, the last items I'll be discussing are "cockpit" items - bars and stem.

Part of me was interested in finding '80s vintage Specialized branded parts for this. Their bars and stems from the time were high quality and nicely finished. The problem is that unmolested vintage bars are hard to find in my preferred width (44 cm). Handlebars in the '80s just weren't typically as wide as I like today, and it wasn't uncommon back then to find 38 or 40 cm bars on many complete bikes - even in the larger frame sizes. It's hard to imagine a bike today with a 60 cm frame and only 40 cm bars, but it was common back then. The other issue is that the older stems were not as long/tall in the quill, and these days I like to get my bars a little higher than I did when I was in my 20s. (I think the Specialized ones were a little longer than contemporary Cinelli and other popular Italian stems from the time, but still not long enough for my current tastes).

I decided to get current production Nitto items - and truth be told, Nitto is the same company that made the bars and stems that bore the Specialized brand back then, so something about it still feels "right." My bars are Nitto mod. 176, which were once sold by Rivendell as "Dream Bars." They are a favorite of mine.

I have the 176 bars on more bikes than any other bar brand or model. In reach, drop, and shape, they just seem to work well for me.
I like that the logos on the higher quality Nitto bars are reminiscent of the old (pre '78) Cinelli "coat of arms" logo. I saved a bit of money in finding a very lightly used set of bars. There are some marks left on the bends from mounting brake levers - but the center section looks perfect - once they're wrapped, it will be impossible to know they weren't brand new.
Mod. 176 - 440 mm.
For my stem, I've got the Nitto Technomic. Again, I saved a bunch by finding a lightly used one. What few marks that are on it from installation are down near the bottom and will be well out of sight once I get it installed on the Sequoia. I strongly suspect this one was installed and removed again without actually seeing much/any use - maybe someone decided it wasn't the right size for them? In any case, this is the non-anodized version, which means the finish isn't as "maintenance free," but if it does get scuffs or scratches, it can easily be re-polished.
So, if readers couldn't figure it out from my recent post on bar-end shifters, these are the shifters I decided to use on the Sequoia. SunTour BarCons have a nice ratcheting mechanism so the action is fairly light - and I do like the "convenience" of shifting with them. Cosmetically this pair looks about as good as they come, short of finding a brand new set still sealed in the package (and yes, one can still find those!).
The styling of these didn't change much at all from their introduction in the early '70s up until the advent of their Accushift indexing version in the late '80s. As mentioned in that earlier post, one cool feature of SunTour BarCons is that they are completely rebuildable - and most of the necessary small parts can still be found! I've seen (and bought) NOS rebuild kits that included all the little nuts and bolts, and one can find new bodies/pods, ratchet covers, rubber lever hoods, and expander wedges. The only NOS replacement parts I never see for sale are the tiny ratchets, pawls, and springs - and those can be scavenged from used pairs if needed (and they are rarely needed!). Not only that, but many of the internal bits are also interchangeable with the downtube-mounted versions which are plentiful and cheap.
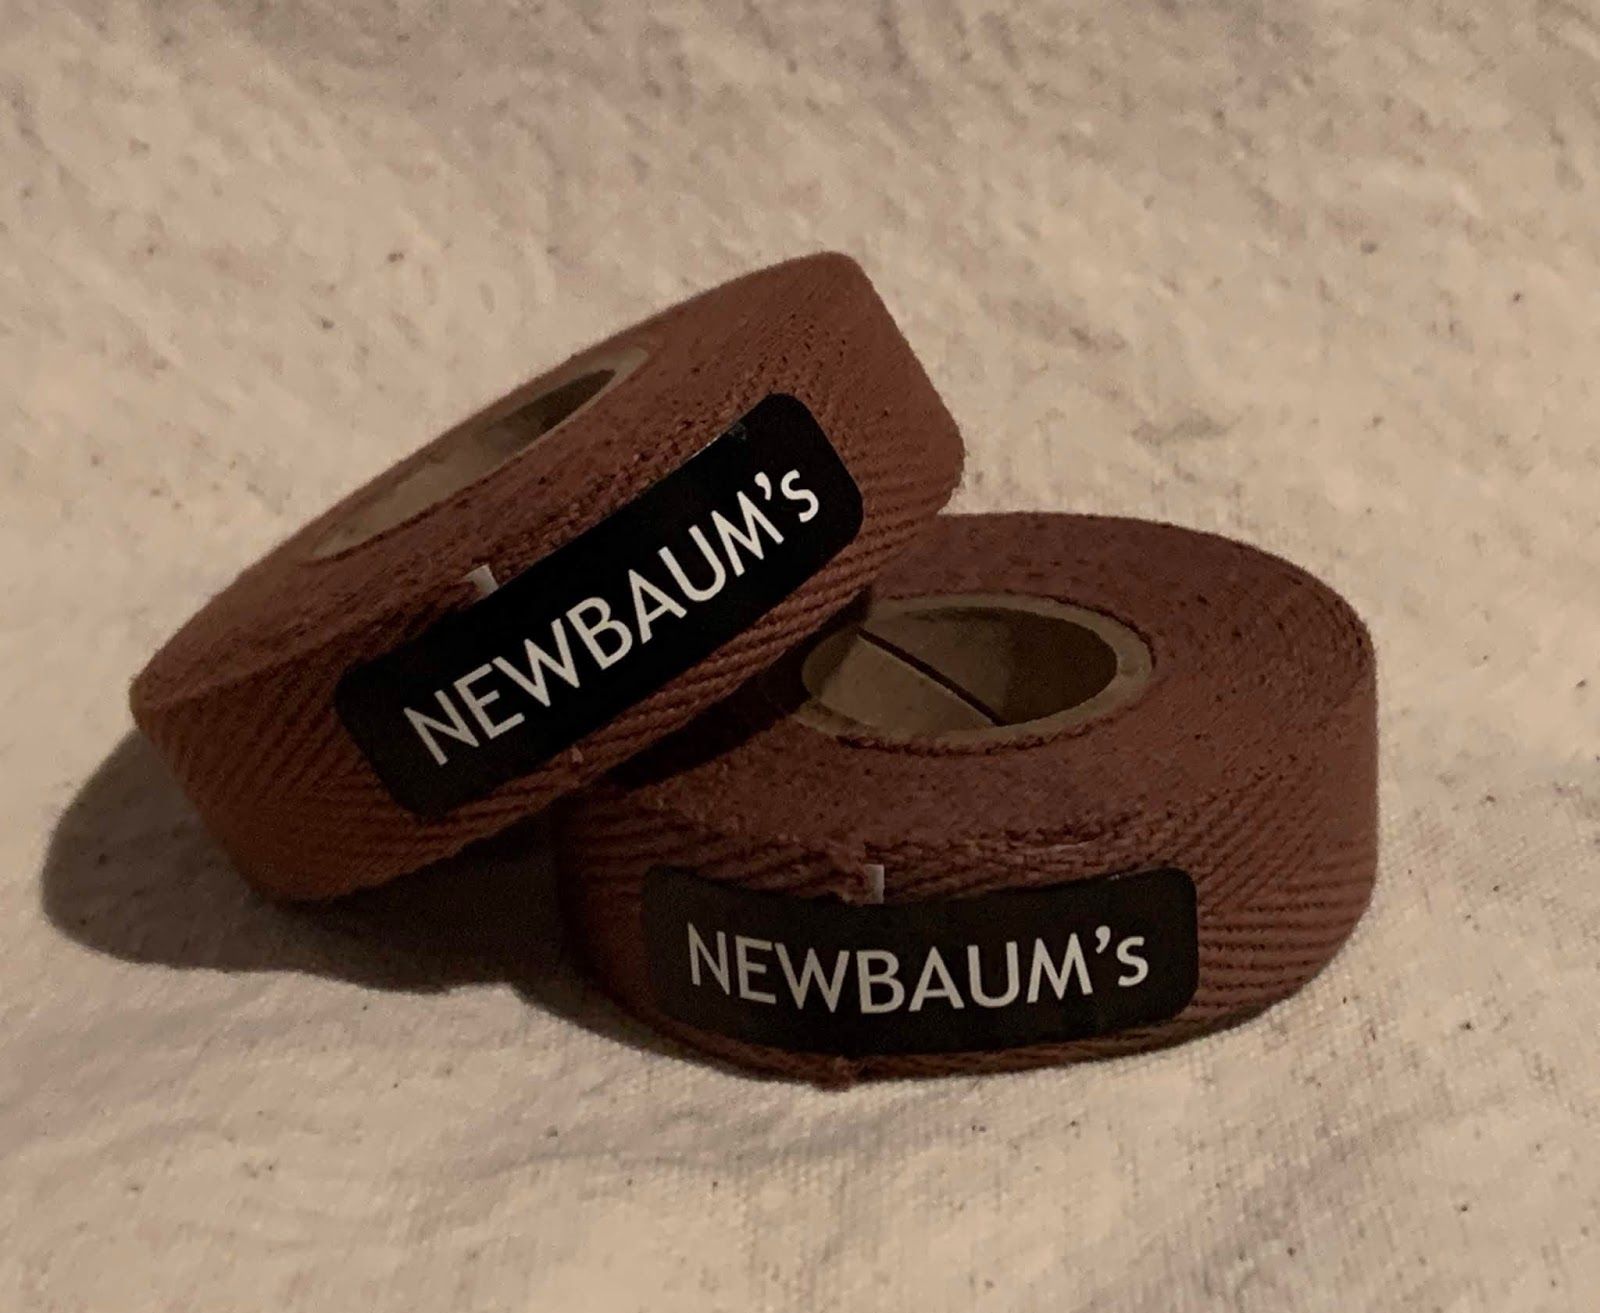
When it's time to wrap the bars, I'll be using Newbaum's cotton tape. Top quality stuff, and the rolls are a little longer than the Velox that I sometimes use - so, better for wide bars. Starting with brown tape, and with a few of coats of shellac (one or two of amber, one or two coats of clear) it will look almost like aged brown leather and be a nice match to my saddle.
That covers all the parts I've chosen for the Sequoia, save for a few minor odds and ends, nuts and bolts, etc. I literally just got a call from the painters to say the frame is ready for pickup, so once I get it back, I'll be sure to get more pics as it all gets put together. Stay tuned. . .